4.3) The Peak Controller
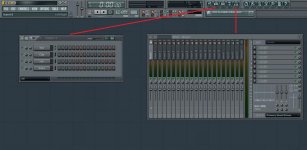
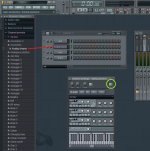
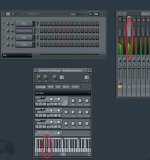
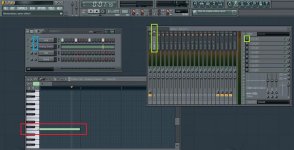
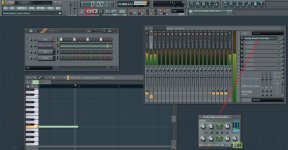
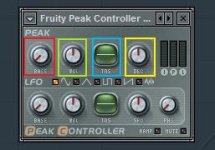
Open the peak controller, and press the play button. Make sure the mute box on the peak controller is unchecked if you plan on having the kick drum being used for the sidechain audible in your final mix. You will notice that when the kick drum hits, the 'P' meter jumps up and then falls back down slowly. This is the peak meter display, and it measures the peak volume of the instrument it is assigned to and generates a visual depiction of it's amplitude.

The peak amplitude of the drums is what will be used to drive the sidechain effect. Now here is where the shortcut comes into play. Usually, the sidechain is done with a compressor, but I am not going that in depth here - that's why this is the shortcut tutorial! Using a compressor produces a slightly better sound, however. Instead of a compressor, we're going to use the insert volume in it's place...ooooOOOOOOOOoooooo shortcut.
4.4) Hooking this Bad Boy Up
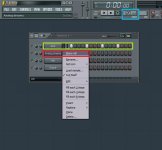
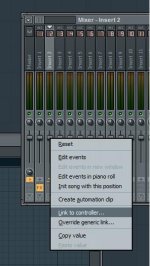
OK, we're almost there. Next up we are going to link the insert 2 volume slider to the peak controller by Right Click>Link to controller...

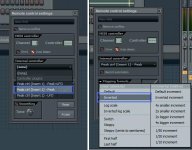
When the window pops up, there are a few things to do. First we are going to click on the Internal controller box and select Peak ctrl (Insert 1) - Peak, And under the Mapping formula box, select Inverted.

What did we just do? We just linked the volume of insert 2 to the inverse of the peak level output by the kick drum. To put it simply, we just told FL to make the synth volume go down when the kick volume goes up. Why did we link the insert volume in the Mixer and not the volume nob in the Step Sequencer? The insert in the Mixer takes the input volume of the instrument from the Step Sequencer and routes it through itself before sending it to the Master Output channel of the Mixer. This allows us to raise and lower the volume of the instrument being sidechained independent of the actual output volume. Once again, put simply, this allows us to raise and lower the volume of the overall sidechain effect.
4.4) Polishing the Mirror
Once all of this is done, you should notice the 'boom wah' effect I first mentioned. If so, great! Your first sidechain! Sit back and have a beer. If not, well, it's time for fine tuning. There are a few knobs on the peak controller that will be your friend at this point: Base Level, Volume, Tension, and Decay (Decay...sorry 'bout the yellow).

Base LevelControls how much base level volume is added to the peak level independent of the kick drum hitting or not. Think of the peak level being how high you can jump. Increasing the base level is like standing a platform and jumping up and down: you can reach higher in the air, but you never come all the way back to the ground.It's default setting is 0 % added base level
Volume controls the additional amplification of the input signal. It doesn't make the instrument louder - it just amplifies the signal being sent to the peak controller. If your bass drum is too quiet to drive the sidechain but the volume on the Step Sequencer is all the way up, try turning up the volume knob. Its default setting is 0 % amplification.
Tension controls how tight the peak meter follows the input signal. A tension raised all the way to maximum will make the meter fly up and down wildly with the kick, whereas a tension of minimum will hardly move the meter around at all. Remember, the peak level is controlling the sidechain effect, so you want that meter moving! Its default setting is 0 % tension.
Decay (Decay) controls the rate at which the peak level generated by the kick drum fades back down to zero. A maximum decay time will result in your synth pad being drowned out completely, as the peak level will not fade fast enough to allow the synth to fade back in. A minimum decay time, on the other hand, will make the synth fade back in so fast that it will sound like it is clicking. This is the most crucial part of the interface, because the decay time will drastically change the sound of our sidechain effect.
Fool around with all of the settings and get familiar with what they do. There is no better way to learn than practice! So get out there and start sidechaining!
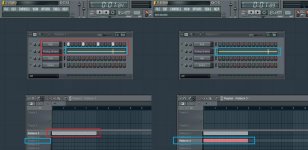
Now that you have the basics of sidechaining down, there are some finer points of application. If you notice, both your kick for sidechaining and your synth are on the same Pattern. To have the synth play without the sidechain effect, simply move your piano roll notes onto another Pattern in the Playlist. Don't want the drums you are using to drive the sidechain to play at all? Go back to the peak controller and make sure that the mute box is checked again. Muting the drums in the Step Sequencer will turn off the sidechain effect completely, and we don't want that!

5.1) A Note on Compressors
Like I mentioned earlier, the proper method for this technique utilizes a compressor, and is referred to as 'sidechain compression'. It has the exact same effect, but it is done without direct volume manipulation. Compressive sidechaining is a little more in-depth, and would take a bit longer to explain. A basic knowledge of compression in general is needed as well, and I would like to include that in the tutorial. That all being said, compressive sidechaining needs a tutorial of its own, which I will consider undertaking at a later date.
---
Questions? Comments? Lost completely? Feel free to PM me. I'll get back to you as soon as I can.
Please Rep this tutorial if it helped ya! I put alot of effort into it.
---
Be sure to check out my other tutorials!
